


I always want to give my baby the very best, like all parents, of course. And when it came to dairy products, I had a lot of questions. Milk should remain the foundation of a baby’s diet until 12 months old, and it continues to be important afterward to support healthy growth. So I started wondering… what if we made our own homemade yogurt?
(Feel free to check out my article on dairy products for babies here)
Making homemade yogurt for your baby
Preparing homemade dairy products can be so much better for your baby’s health than relying on store-bought options. There’s no need to shame anyone for buying yogurt from the supermarket, it’s not necessarily bad! But if we can avoid preservatives, artificial acidifiers, and other additives… well, it’s definitely a plus.
First, let’s go over the basic equipment you’ll need to make yogurt for your baby. Ideally, you’ll want to invest in a yogurt maker: simple, efficient, and perfect for making healthy homemade yogurt!
Equipment needed to make homemade yogurt for babies
Yogurt maker: the ideal tool for preparing baby’s yogurt
Yogurt makers have been around since 1932… and they’re still going strong! Incredibly simple and effective, there’s hardly anything to do, just fill the jars, place them in the machine, and let it do the work until the program is done.
There are plenty of yogurt makers available on the market.
Seb is one of the leading yogurt maker brands in France. The “Yaourtière Multi Délices Express” is one of the best-selling models, and customer reviews are excellent. You can also purchase extra jars.

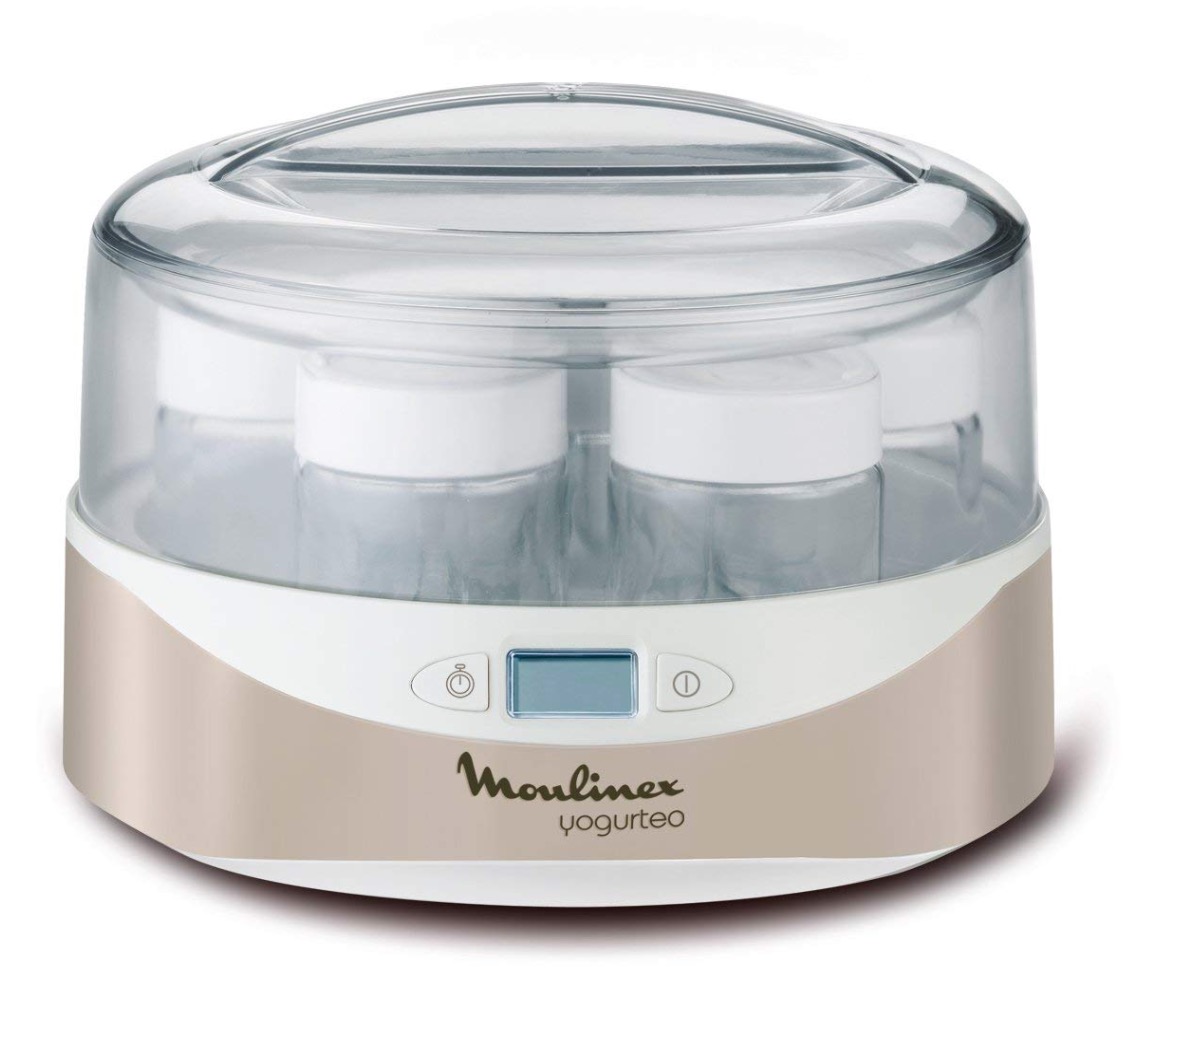
Moulinex and its Yogurteo yogurt maker is also highly rated.
Slightly more affordable. It doesn’t have multiple programs, but it does feature a digital timer.
Finally (and this is the one I personally use), there are also lesser-known yogurt maker brands that work perfectly well!
Séverin offers a yogurt maker that comes with 14 jars (7 jars per batch), which is also very well rated and much more affordable.
It doesn’t have a digital display or multiple programs like the others, but honestly, you really don’t need them!

Can you make baby yogurt without a yogurt maker?
Yes! It’s absolutely possible to prepare homemade yogurt for babies without a yogurt maker. Here are two simple methods you can try:
Making homemade baby yogurt in the oven
Making yogurt in the oven is very simple:
Start by pouring some water into your oven tray (a roasting pan or baking dish works well).
Preheat your oven until it reaches 113°F (45°C). Once it reaches this temperature, turn off the oven, and quickly place your yogurt jars (without lids) into the tray, making sure the bottoms of the jars are sitting in the water.
Close the oven door immediately and leave the jars to set for 8 hours, the residual heat will do the work.
After 8 hours, seal the jars with their lids and place them in the refrigerator.
Steam method
I used my Moulinex Companion to prepare them here.
It’s very simple: just run the steam function for 8 minutes without the yogurt jars inside. Once the time is up, turn it off, quickly place the filled jars without their lids in the steam basket, and close the steamer as quickly as possible (to avoid losing steam).
The yogurts will benefit from the residual steam and will gradually set as the internal temperature drops. Let them sit for 8 hours, then close the jars with their lids and place them in the refrigerator.
Ingredients to make homemade yogurt for your baby: milk, starter cultures…
The milk
To prepare your homemade baby yogurt, you’ll first need milk. If you’re using cow’s milk, the more it’s skimmed, the more liquid your yogurt will be. That’s why I recommend using whole milk, it helps the yogurt turn out nice and thick.
Is your baby allergic or intolerant to cow’s milk protein?
Yes, you can still make homemade yogurt using alternative milks! Plant-based milks, or even goat’s milk or sheep’s milk, can be used. However, because these are more liquid by nature, the resulting yogurt will be less firm. To help with this, you can add a natural thickener like cornstarch (maïzena). I’m currently running tests to figure out the best measurements, stay tuned for updates.
The Starter Cultures
Once you’ve chosen your milk, the next ingredient is your starter cultures. These are what help ferment the milk and give yogurt its thick texture. They also extend the shelf life of your yogurt!
Starter cultures are actually friendly bacteria (yes, really!) that have amazing health benefits (trust me!):
- They boost the nutritional value of dairy products.
- They help eliminate bad bacteria and only keep the good stuff — perfect for our little ones.
- They improve digestion, protect the body, and help restore gut flora.
In short, they’re awesome 😉
You can find them in supermarkets, organic stores, or online.
Personally, I use Alsa starter cultures, because they contain no additives, no milk protein, and no lactose, which is ideal, especially for babies.
Homemade yogurt for babies: How-to and flavor ideas
The best part about making homemade yogurt is that you can switch things up!
With the goal of helping our little ones discover a wide variety of tastes and flavors, you can prepare yogurts with vanilla, orange blossom water, chocolate… the possibilities are endless!
How to store homemade yogurt for babies
I personally keep my homemade yogurts in the fridge for up to 5 days maximum. As mentioned earlier, the starter cultures help extend the shelf life — but I prefer not to go beyond that. And let’s be honest, 5 days is more than enough to enjoy all the yogurts at home!
What about you? Do you make your own baby yogurts (and for the whole family too)?
Your baby may also like
Persimmon and apple compote for baby (From 6 months)
04/18/2025At what age ‘should we’ eliminate the evening bottle for our baby?
05/06/2019